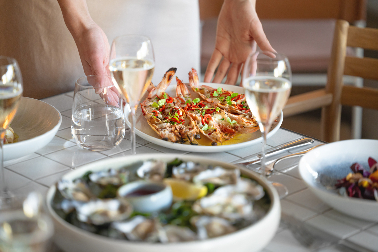
Food photography is a great way to capture the beauty and deliciousness of food. Whether you’re a professional photographer or someone who loves cooking, food photography can be a fun and rewarding hobby.
This article will discuss some tips for capturing irresistible food photos. We will cover topics such as choosing the right ingredients, setting up your shot, and using natural light. We will also provide some examples of great food photography to inspire you.
Meat delivery is convenient, and easy to get fresh, high-quality meat delivered to your door. If you’re looking to take your food photography to the next level, using meat delivery is a great way to ensure that you have fresh, high-quality ingredients to work with.
Tips for Choosing the Right Ingredients
The first step to capturing great food photos is to choose the right ingredients. Fresh, high-quality ingredients will make your food look its best. When choosing ingredients, look for vibrant colours and interesting textures.
If you’re using meat, make sure it’s fresh and well-trimmed. You may also want to consider using different cuts of meat to create variety in your photos. For example, you could use a flank steak for a grilled steak salad or a lamb shank for a braised lamb dish.
Setting Up Your Shot
Once you have your ingredients, it’s time to set up your shot. The key to food photography is to create a visually appealing composition. This means using props, backgrounds, and lighting to create an interesting and inviting scene.
When setting up your shot, consider the following tips:
- Use a variety of props to add interest to your photos. This could include anything from fresh herbs to kitchen utensils.
- Choose a background that is complementary to your food. A neutral background will help highlight your food’s colours, while a patterned background can add visual interest.
- Use natural light whenever possible. Natural light will give your food photos a more natural look. If you’re shooting indoors, try to position your food near a window.
Using Natural Light
Natural light is the best light for food photography. It provides a soft, diffused light that is flattering to food. If you’re shooting indoors, try to position your food near a window. If you’re shooting outdoors, shoot in the shade to avoid harsh shadows.
You can use artificial light if you don’t have access to natural light. However, it’s important to use artificial light carefully. Too much artificial light can make your food look flat and unnatural.
Food Photography Composition Tips
In addition to choosing the right ingredients and using natural light, it’s also important to consider the composition of your food photos. Here are a few tips for creating visually appealing food photography compositions:
- Use the rule of thirds: The rule of thirds is a composition rule that divides your frame into nine equal parts, with four vertical and three horizontal lines. Placing your subject at the intersections of these lines creates a more balanced and visually appealing composition.
- Use leading lines: Leading lines lead the eye through the photo. This could be a fork, a knife, or even the edge of a plate. Leading lines can help to create a sense of depth and interest in your food photos.
- Fill the frame: When shooting food photography, it’s important to fill the frame with your subject. This will help to make your food look more appealing and inviting.
- Get creative with your angles: Don’t be afraid to get creative when shooting food photography. Try shooting from above, below, or even from the side. This will help to create unique and interesting compositions.
Post-Processing Tips
Once you’ve taken your food photos, you may want to do some post-processing to improve them. Here are a few tips for post-processing food photos:
- Adjust the brightness and contrast: Adjusting your photos’ brightness and contrast can help make them look more vibrant and appealing.
- Add saturation: Adding saturation to your photos can help to make the colours pop.
- Use filters: There are many great filters available that can be used to improve food photos. Experiment with different filters to find the ones that you like.
- Crop your photos: Cropping your photos can help improve your photos’ composition and focus.
Food Photography Gear
A few pieces of gear can be helpful for food photography. Here are a few essentials:
- A DSLR camera: A DSLR camera will give you more control over your photos than a point-and-shoot camera.
- A tripod: A tripod is essential for getting sharp food photos.
- A macro lens: A macro lens will allow you to get close-up shots of your food.
- A lightbox: A lightbox is a great way to create soft, diffused light for food photography.
Food Photography Tips for Beginners
If you’re a beginner to food photography, here are a few tips to help you get started:
- Start with simple dishes: When you’re first starting, it’s best to start with simple dishes. This will help you focus on food photography basics, such as composition and lighting.
- Practice makes perfect: The more you practice, the better your food photos will become. So get out there and start shooting!
- Don’t be afraid to experiment: Food photography has no rules. So don’t be afraid to experiment with different techniques and compositions.
- Have fun! Food photography should be fun. So relax, enjoy yourself, and let your creativity flow.
Conclusion
Following these tips, you can capture irresistible food photos that will make your mouth water. So get out there and start experimenting! You’ll be taking stunning food photos with some practice in no time.
Additional Tip: Check out food photography blogs and magazines if you want inspiration. You can also find great food photography tutorials on YouTube.
Bonus Tip: If you’re using meat delivery, be sure to ask your provider for tips on preparing and cooking the meat. This will help you to ensure that your food photos look their best.

